First, let's look at the question - why format flash drives?
Oddly enough, the main reason for formatting is not viruses on flash drive, and the inability to write a file to a flash drive larger than 4 gigabytes. Some users have encountered this problem, like an 8 GB flash drive write to flash drive movie, ISO image, folder and other files - it doesn’t work. Many manufacturers produce flash drives in the format FAT32, and fat32 does not support transfer of large files. The maximum file size that can be written to a fat32 flash drive should not exceed 4 gigabytes (). This is why flash drives are formatted fat32 V ntfs.
Formatting allows you to get rid of viruses on a flash drive. If you checked the flash drive for viruses using and they didn’t find anything, but you have a suspicion that there is a virus on the flash drive- It's better to format it.
Another reason for formatting is the slow operation of the flash drive. After deleting unnecessary files, empty spaces (clusters) remain. As a result, the flash drive began to work slower - the flash drive format will help speed up its operation.
Also, formatting must be done before creating a bootable flash drive. If you want to install Windows OS from it yourself, burn programs to restore the system onto a USB Live CD, then you first need to format the flash drive.
These are, in principle, all the basic answers to the question of why format a flash drive.
Formatting Types
There are two types of formatting - quick and full. What are the differences between them? With quick formatting, only the file allocation table and MFT are cleared, i.e. the data that was on the flash drive can be restored. With full formatting, the data is completely destroyed - overwritten with zeros.
Full formatting usually used in case of malfunctions - for example, errors in writing and reading a flash drive.
Formatting Methods
You can format flash drives using the operating system itself or using formatting programs, for example or.
Formatting using OS Windows
Important: before formatting, copy the necessary files from the flash drive to your hard drive or other drive so that you don’t have to restore the files using !!!
The simplest and most accessible formatting method. Right-click on the flash drive icon and select Format.
Formatting this way from fat V ntfs impossible, and you also cannot change the cluster size and flash drive capacity. You can only assign a volume label (title, name) - what the flash drive will be called on your or another computer.
.
If you check the Quick formatting box, the table of contents will be cleared (the difference between full and quick formatting is given above).

I don’t think it’s worth explaining about the “Start” and “Ok” buttons. After formatting you will see this picture

Second formatting method using Windows
You can format a flash drive at the command line. To do this, it is enough to know the letter of the volume (in this case, the flash drive). Open CMD and write the following command, for example:
format L: /fs:FAT32 /v:LamerKomp
Where format- this is formatting, L- volume letter (disk, flash drive, etc.) that will be formatted, fs- the file system in which the formatting will be performed (fat or ntfs) and v- this is the label (name) and press ENTER.

You can also specify additional parameters: Q is , A is the cluster size. If you want to know more about them, enter help format at the command line and press enter.
note: all letters are written in the Latin alphabet, case is not important.
The described methods are good for formatting a flash drive from Fat to Fat, from NTFS to Fat, if you need to format a usb flash drive from fat to ntfs- use .
Useful information on flash drives
Flash drive– a removable, solid-state USB drive that is used to transfer or store information by users. There are often cases when, as a result of some kind of failure, it is not possible to format a flash drive. The flash drive itself consists of two components: a controller and memory. There are a great many reasons why a drive can fail, but some of them can be solved on your own.
We already had an article about. We did this in the standard way.
If you can’t format a flash drive using standard methods from the window "My computer", then you can try using additional means.
Formatting using the command line
To do this, go to the menu "Start" and point "Run"(this item can be called using hot keys Win+R), after which we enter "cmd". The console will open. We will use the command "chkdsk", which will allow you to perform a low-level disk check.
To do this, enter into the console "chkdsk H: /f /r", Where "H:" this is the name of the disk that is a flash drive (if the name is different, you need to change it to the desired one).
After the command has been entered, you must press Enter and the check will start. The scan may take a long time, depending on the storage capacity. If the check is completed successfully, then you can format the flash drive using standard means.
Formatting using a third-party utility
Let's use the utility HP USB Disk Storage Format Tool. You need to download and unpack it. This program does not require installation, but it is better to run it as an administrator. After launching in the menu "Device" you should select the required flash drive (attention, you must choose correctly, otherwise you can damage your computer). You can navigate by the name and capacity of the drive.
Next, you need to select the required type from the menu "File System"(most often this is FAT32), set the label in the line "Volume label" and press "Start". You don’t need to check any more boxes, and if they are, you need to disable them. If formatting was successful, the flash drive will continue to work.
The above methods are only suitable if the USB drive is detected by the system normally; if this does not happen, it means that the flash drive controller is most likely damaged and repair will require more effort. If the memory chip is not damaged, then after the above manipulations the flash drive should start working normally. And most importantly, in order to avoid losing valuable data, you should always make a backup copy of the data placed on the flash drive, then if the flash drive fails, it can be easily disposed of without worrying that the data is lost.
This article is an instruction, as well as a solution to problems that often arise during a system failure or USB drives infected with viruses.
From a removable drive, you can make a bootable USB flash drive, write a Windows 7 image onto it, and install it, just like from a regular CD-DVD drive. This requires a format that we will use.
However, to get it right format the flash drive, there are a number of very important nuances that we will try to describe as clearly as possible.
Flash drive formats and formatting nuances
To get started with the task, let’s briefly look at what formats are and which one to choose.
If you don't understand and just want to know how format flash drive, we recommend choosing the NTFS format instead of the usual FAT32, which is the default.
The fact is that in FAT32 you can write the same type of file of no more than 4 gigabytes to a flash drive, just as in NTFS you can write large files.
- FAT32– up to 4 gigabytes;
- NTFS– for recording large files 16TB. It has a complex hierarchical system.
Beginning the process of formatting the flash drive
If you have important files on a flash drive, copy them to a safe place or to your computer.
If difficulties arise or it is not possible to read important files on a flash drive, you can try to disinfect the flash drive with an antivirus, and as a backup option, use programs to recover deleted files.
Formatting a flash drive happens quickly and should not cause any difficulties, but if they do arise, we will give you 2 additional formatting options, methods that are also worth taking note.
- way.
Open my computer using the key combination:
Select the desired flash drive and right-click, select format .
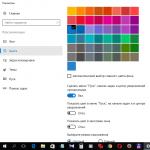
In the formatting settings, you need to select the file system, in our case it is NTFS.
Volume Label – this is the name of the flash drive. You can write it freely, of your choice.
Quick cleaning – will delete all files only superficially, but invisible garbage in the bytes themselves will remain. Some information, if possible, can be restored using special software.
Therefore, if after formatting there are some difficulties in using the flash drive, this may be caused by viruses that could damage the flash drive at the byte level. In this case, uncheck the “quick clean” box in order to format the flash drive completely and return it to proper operation.

We agree with the warnings if we have saved all important files on the computer.

We are waiting for notification of the completion of the operation.

Formatting using the command line
2. method.
How to format a computer flash drive via the command line? It must be reliably connected directly to the port or via USB in order to successfully complete the work without unpredictable errors.
To call command line use the key combination:
Type the command “cmd” into the field and press Enter or OK.

A command line will open, where you will need to use something like the following command to reformat:
Let's take the team apart :
formatJ: — the letter index of your disk, scientifically, the volume label. Open “My Computer” and see which letter you have.
/FS:NTFS– file system type, in our case NTFS.
/Q– used when quick formatting or remove it along with the slash, for full formatting .
/V:TOSHIBA– volume label or media name. Simply put, the name of the flash drive.
As you can see, choosing a volume is not a problem or other settings are easy to use.

All that remains is to press Enter.
Another one will appear mini notification, where you should also press Enter. Then you should wait until the line “Available: number of GB” appears.
After this procedure, you can easily get rid of files that are not deleted.
Little known bug in the hierarchy structure: how to fix a flash drive with an erroneous hierarchical system? No way, if such an error pops up, then you should take warranty card and change the flash drive under warranty.
Formatting large flash drives
It happens that a flash drive needs to be formatted in FAT32 format, but the normal Windows environment will not see anything other than NTFS if the flash drive is 64 GB or more. In addition, some platforms refuse to see it at all.
To clean a large flash drive, you need to use third-party software. For this purpose there is a very good program “MiniTool Partition Wizard Free Edition”.
We install the program and perform the first launch.
In this case, click on the pencil with stars and get to the main menu of the program:
Enter the name of the flash drive (volume label) and select the FAT32 or NTFS format. Ready!
Since these three methods will be sufficient, other options should not be taken into account on how to format a flash drive, and there is no need to use additional solutions because The methods given here will be quite sufficient. I would also like to say about the programs; in the future, if you encounter difficulties with large flash drives, just enter the appropriate name into any search engine. There are many free software solutions available.
To format a flash drive, a standard function of the operating system is enough. To format, you need to run a special system utility in which you select the future file system format of the flash drive (FAT32, NTFS, ext4) and the type of formatting (shallow or full). If you cannot format it, you will need special programs for this.
What does it mean to format a flash drive?
Formatting a flash drive is the process of marking out a data storage area, which creates a file system structure.
In other words, formatting a flash drive is the process of deleting all data in order to clear the device’s memory, as well as the process of changing the data storage system (file system).
It is necessary to format a flash drive in order to clear it of the remnants of deleted files, as well as to exclude or get rid of viruses.
Despite the fact that a flash drive today is the most convenient and practical means of transferring information, various problems occur with them, some of which we helped solve: when or. In this publication, site experts will tell you how to properly format a USB flash drive in different operating systems.
When buying a new flash drive, you must format it.
Reasons for formatting:
- Free clusters. As you know, after overwriting files, free clusters remain on the flash drive, which subsequently accumulate, which leads to a decrease in the volume of the flash drive, as well as to its low operating speed.
- Virus prevention. If you suspect that there may be or have been found on the flash drive, the flash drive must be formatted.
- Changing the file system. You cannot do without the formatting process if you want to change the file system of a flash drive.
Format the flash drive
Next, we’ll look at step-by-step instructions on how to properly format a flash drive in different operating systems.Before formatting the flash drive, make sure that there is no necessary unsaved data left on it.
Windows
In order to format a flash drive in, you must first connect it to and open “Explorer” or “My Computer”. Then, in the list on the left, where all drives are listed, select the flash drive to be formatted, right-click on it and select “Format”.
In the window that appears, in the “File system” section, select the required one. In the “Volume Label” field, you can optionally enter the desired name of the flash drive.
Pay attention to the “Format Methods” section; if you leave a checkmark next to the “Quick” item, this is a quick formatting mode in which data is “superficially” deleted (although it is deleted, it can be restored). If you uncheck this item, a complete formatting will occur, which will qualitatively delete all data without the possibility of recovery.
When everything is set, click on the “Start” button.

After this, the system will display a message stating that the process will destroy all data from the device; if you are sure that there is no necessary data left on the flash drive, click “OK”.

After the formatting process is completed, an information window will appear in which you will need to click “OK”.

That's the whole process of formatting a flash drive in Windows.
Let's look at the procedure for formatting a flash drive using an example. Insert the flash drive and open the search window.

In the window that opens, find the “Disks” utility and launch it.

Then, from the list of drives on the left, select the desired flash drive and disconnect the file system by clicking on the corresponding button.


In the window that appears, set the formatting settings. As is the case with Windows, here you can choose the type of formatting: quick or full, as well as the type of file system. If desired, you can specify the name of the flash drive in the “Name” field. Having entered all the data, click on the “Format” button.

A warning window will then appear. To continue the formatting process, click on the “Format” button.

After some time, the flash drive will be formatted and ready for use.
Mac OS X
There is also nothing complicated about formatting a flash drive in the Mac operating system. To do this, press the F4 key and call Launchpad, there is “Disk Utility”.

After inserting the flash drive into the device, we launch this utility.

In the window that opens, select the desired flash drive, and on the right side go to the “Erase” section. In this section, select the file system type; if desired, you can specify a name for the flash drive. Having entered all the data, click on the “Erase” button.

Then a window will appear warning you about deleting data, in which you will need to press the “Erase” button again.

That's it, the formatting process is complete.
File system selection
The most common 4 file systems for flash drives are:- FAT32– one of the oldest file systems on which new flash drives work by default;
- NTFS– a newer file system relative to the previous one is the most popular today;
- ext4– a file system for working in the Linux operating system.
If with the previous file system the issue was resolved quite simply, then with the choice between FAT32 and NTFS the situation is somewhat complicated. The fact is that these are two equally used file systems on flash drives, each of which has its own functional and technical capabilities.
If you plan to write files larger than 4 GB to a flash drive, then it must be formatted in the NTFS file system. This file system is considered native to Windows and is characterized as more reliable.
However, not many devices support the NTFS file system, such as car radios, media players and some other multimedia equipment. There is also no point in formatting flash drives smaller than 4 GB in NTFS.
NTFS is more stable and reliable, and FAT32 is faster.
Formatting programs
A flash drive, like any other device, can have operational problems. For example, after using a flash drive for a long time, problems may arise with formatting it using standard utilities. If you encounter such a problem, then you should use one of the third-party programs that specialize in formatting and restoring flash drives. Such programs include:- HP USB Disk Storage Format Tool. A proprietary utility from HP, which quite successfully solves problems with formatting flash drives not only of its own production.
- TranscendJetFlashRecoveryTool. Another good utility from Transcend, which restores flash drives of any manufacturer if it is impossible to format them.
- D-Soft Flash Doctor. A well-known recovery utility that helps save and format even broken drives.
Sometimes, to restore the functionality of a flash drive, you need to format it. In this article, we will look at how to properly format a flash drive and which formatting system is better to choose: FAT or NTFS.
To format a flash drive, you should not download or look for any special programs or utilities. Windows handles this task perfectly in a short time.
What is the best formatting system to choose? How is the FAT system different from NTFS? All you need to know about these systems is that you cannot copy or write a file larger than 4 gigabytes, for example an ISO image or some high-quality movie, to a formatted flash drive in the FAT system. And the NTFS system supports recording files larger than 4 gigabytes.
So when choosing to format a flash drive, be guided by the size of the file you want to write to it.
So, to format the flash drive, insert it into the USB port of the computer and wait for it to be detected. Open “My Computer”
We find our flash drive. For me it is called “SARDU”, for you it will most likely be called “Removable Disk”. Read below how to name a flash drive with your own name.
Select the flash drive with one click of the left mouse button

Then click on the selected flash drive with the right mouse button, thereby bringing up a window with a choice of options. In the window that opens, select “Format”

The formatting window opens. Here we can choose which section to go to format FAT or NTFS

Select a formatting system from the drop-down menu. For example, I chose NTFS, since I need to write a file larger than 4 gigabytes

In the “Volume Label” form, enter any title or Name. This will be the name of your flash drive. It will be visible when browsing your computer's disks. For example, I called it “SARDU”, now I gave it the name “My flash drive”

Below we see formatting methods. Mostly quick formatting is used, but if your flash drive is very buggy, then you can use full formatting; to do this, you need to uncheck the box next to “Quick (cleaning table of contents)”. Be aware that full formatting will take much longer than usual. So everything is ready. Click the start button.
A warning information window should appear. We agree and click the “Ok” button. Formatting has started.

After formatting is complete, an information window will appear indicating that formatting is complete. Click “OK” 
Now we see that our flash drive is formatted and empty. It's called "My flash drive", i.e. as I wrote in the “Volume Label” field

And remember that formatting a flash drive will destroy all data on it. So before doing this, copy all the files to your computer.