Often, there is a need to deny access to popular social networks such as Vkontakte, Odnoklassniki, Facebook, etc. For example, for employees of a company, or even at home. There are many ways to do this. You can, for example, block it using special programs, in the antivirus or firewall settings, or in the same hosts file.

But this doesn't always happen. Some online service applications request access not only to general information, but also to other data And functions, up to the ability to publish, edit and delete posts on your wall. There will be no confirmations or settings, but problems are possible.
Access control for VKontakte online service applications
Fortunately, all these “connections” can be controlled in the VKontakte settings. Below I will provide step-by-step instructions on how to do this.
Application access control in the new VKontakte interface
Step 1: Go to My Settings page
 Go to the “My Settings” page from the VKontakte menu
Step 2: Go to Application Settings page
On the page that opens, in the right column, click the link “ Application Settings».
 Going to the “Application Settings” page from the “My Settings” page on VKontakte
Step 3: Uninstall the app
On the page that opens you will see a list of connected sites and applications. If you wish, you can click the " gears» in the application line and view its settings and access rights. It is noteworthy that not all applications have settings, and the access rights granted to the application cannot be changed. So if you are not happy with something, click the icon with “ cross" in the application line or link " Delete…» in the application settings window.

Application access control in the old VKontakte interface

Step 2: Go to your apps settings page
Click the link " Applications" - the VKontakte application catalog will open. Go to the " My applications"- by default you will see the message: “You have not connected any applications yet” - this is normal. Click the link " Settings"and here is a page with a list of those applications to which we gave access to the account:

Step 3: Set up and remove the application
In fact, by clicking the link “ Tune» in the application line, you will not be able to configure anything, but only see what data you have given it access to. If you are not satisfied with something, click the link “ Put away"and remove everything unnecessary.

Video: How to deny access to the VKontakte application?
How to close (deny) access to the site
Sometimes there is a need to block access to a specific site or group of sites. To avoid explaining for a long time, I can give you an example. Let's say your child is a fan of social networks and often visits sites like VKontakte or Odnoklassniki, but he has more important things to do, such as preparing homework or tomorrow's test, etc. What should be done in this case? – Leave access to the Internet, but prohibit viewing certain sites.
This, of course, can be done, but you just need to take into account that if the person from whom you are going to block this access is well versed in computer technology, then doing this is pointless.
I already touched on this topic once in an article about “Parental Control”. This is one of the ways to block sites, if you are interested, you can read it.
In this same article I want to show how to do the same thing, but without installing anything or configuring anything special. It will be enough just to correct a certain file using notepad.
And so we will begin to block the site or sites. Let's say you need to block access to the VKontakte website. To do this, you need to make sure that you have administrator rights.
Find the hosts file in the following path: C:\Windows\System32\drivers\etc.
Open it using notepad:

We write the following in the file:
127.0.0.1 vk.com
If you need to block several sites, then you need to list all the addresses in a column:
127.0.0.1 site_address
127.0.0.1 next_site_address
127.0.0.1 address_of_another_site
It's no secret that despite all the benefits that the Internet has brought with it, it has become a global trash heap, since anyone can open their own website and post on it whatever their heart desires. In this garbage dump you can find real diamonds, but there are also harmful, dangerous, porn and other sites. And there are very fascinating sites on which both adults and children hang out, to the detriment of work, study and even health. Therefore, many employers, parents and other users want to know how to block access to the site.
Browsers
This can be done for a specific browser. Let's say, for Internet Explorer you need to go to Internet Options, open the Contents tab, select Access Restriction - enable. In the window that opens, you can set restrictions by age categories, as well as allow or deny access to any site. In the Opera browser, go to the Tools menu, then Advanced, then Blocked content. In the window that opens, you can enter all the sites that should be blocked.
All browsers have similar capabilities, but nothing will prevent the user from downloading a portable version of the browser from a flash drive and bypassing all these restrictions.
Hosts file
You can block access to certain sites using the hosts file. You can find it by following the path C:\WINDOWS\system32\drivers\etc. This file is located in the etc folder. It is used to match IP addresses with the names of known sites. Normally the computer will ask the DNS server for this, but if this information is in the hosts file, it will not do this. For example, here are some valid comparisons:
213.180.193.11 yandex.ru
87.240.131.100 vk.com
213.232.249.155 freelance.ru
87.240.188.252 vkontakte.ru
You can open the file using notepad. Usually, if no one has edited it yet, including an evil virus, it contains several explanatory entries that begin with a # sign at the beginning of the line. At the very bottom there is usually an entry:
127.0.0.1 localhost
::1 localhost
localhost is the computer itself. If these lines are also preceded by # signs, they need to be removed. Now you can add the necessary (or rather unnecessary sites) by matching them with the same IP address, for example:
127.0.0.1 vkontaktesvami.ru
127.0.0.1 por.ru
127.0.0.1 teryra.com
In one line, first write the IP address, then the name of the site. There must be at least one space between them. You can add a comment after the # sign. After this, you need to save the changes through the File menu and restart the browser. When you access one of the specified sites, the computer will look for them in itself, and the browser will display a blank page.
By the way, you can write the IP address of any other site instead of 127.0.0.1. For example, if you write
84.52.123.191 vkontakte.ru
then instead of the VKontakte website the elhow.ru website will load. Just remember that every user with administrator rights can edit the hosts file, so you need to make sure that those for whom restrictions are introduced have the rights of ordinary users.
In contact with
Closing access to the VKontakte site, which, by the way, has completely moved to the new address vk.com, turns out to be somewhat more difficult. The fact is that a lot of resources have appeared that provide alternative access to this site, as well as to Odnoklassniki and other similar sites. You can try to track them on resources like AccessYes, BanNo, and the like. Here is a far from complete list of addresses where you can get to the VKontakte website:
So you’ll have to work hard by organizing a competition with your child to find and ban them.
Instructions
Block access from the Internet Explorer browser.
Launch Internet Explorer and open the Tools menu. Select Internet Options. Select the Privacy tab and click the Nodes button. Enter the addresses of the sites you want to block access to in the appropriate field and click “Block”, then select “OK”.
Block access from the Opera browser.
Launch the Opera browser. Go to Settings and click on the Advanced tab. Select "Content" in me on the left side of the form. Click the "Add" button and enter the URL of the site you want to block. Close the menu and restart your browser.
Block access from the Mozilla Firefox browser.
Firefox offers the use of its add-ons to block sites. One of the most convenient plugins is LeechBlock, but there are others. Launch Firefox. Go to Tools, Add-ons and find LeechBlock. Click Add to Firefox. Click the "Install Now" button. Once the installation is finished, restart Firefox so you can start blocking access to websites with LeechBlock.
Click Tools at the top of the menu. Select LeechBlock and then select Options.
Enter the address of the site you want to block. This program is convenient in that you can choose not only complete blocking of the site, but also temporary blocking - at certain hours or days of the week, for a certain period of time. This is useful for self-discipline if you want to resist the temptation to get distracted from work. It is no less convenient for monitoring children.
Many of us spend a huge amount of free time on social networks, where we meet and communicate quite a lot. Both with loved ones, with friends, and with people you don’t know very well. Sometimes it happens that when communicating with some VK users, even virtually, we do not experience positive emotions and such communication does not bring us joy.
There can be a myriad of reasons why we do not want to communicate with someone on social networks. For example, someone is just “sick” and constantly sends you spam. Well, or you simply don’t want anyone to see your page (although you can view it from any other account)). Therefore, such an unwanted user should simply be blocked. For this:
1. Log into your VK account.
2. Click "My Settings".
3. Find the “Privacy” tab, where the settings that we will need are located. There are subtleties here:
If the person you want to block should remain as a friend, then do this:
select the desired type of privacy, such as a message or wall post.
Click. We select the “All except” item, where we indicate the user we want to block, and then other users will be able to send messages, but this one will no longer be able to. We do the same with invitations, notes, etc.
It can be simpler - remove the chela from friends. Then go to the Privacy tab and set all available items to the “Friends Only” status. And then all actions on your page will be available only to friends. And since you no longer have “this” user as a friend, he is actually blocked.
Well, the most effective way, of course, is to block a specific user by blacklisting him. This setting was created by the administration specifically to block “inconvenient” users. This is, in fact, a list of those users who cannot send you messages or add you as a friend or view photos on your page.
Add to the Black List on VKontakte. Not a little more difficult than in Odnoklassniki. But, in order:

1. Go to My Settings.
2. Next, open the Black List tab.
3. Specify the username or URL link of his page.
4. Click add and save the settings.
5. That’s it, now this person will be completely blocked.
How to block a user in the VK mobile application
To block, you will need to visit the user’s page in the application and click on the three vertical dots. Next, select “Block” in the menu that opens, see photo below.
Block a user in the mobile version of VK (m.vk.com)
In the mobile version of the m.vk.com website, you should also go to the user’s page and click on “More”.
Yes, I understand that it’s a little off-topic, but I come across this question more and more often. Why might you even need to block a person on VKontakte? In short, the average picture looks something like this: a school-age child spends more and more time on contact, spends less and less time on homework, becomes dumber, and the parent is indignant (you can find a lot of interesting information about the monstrous harm of social networks). Several times I helped people with advice over the phone. I think it wouldn’t hurt to write a small note on the topic of blocking Vkontakte.
VKontakte blocking
The easiest way to block VK through hosts
So, the correct way is to set up a firewall. For some parents, installing a firewall and configuring it is a non-trivial task. Therefore the simplest way.
Open "My Computer". In the address bar we enter “c:\windows\system32\drivers\etc\hosts” and we will be prompted to select a program to open the hosts file. Select Notepad. At the very bottom add the lines:
| IP | Domain |
| 127.0.0.1 | vkontakte.ru |
| 127.0.0.1 | www.vkontakte.ru |
| 127.0.0.1 | vk.com |
| 127.0.0.1 | www.vk.com |
| 127.0.0.1 | durov.ru |
| 127.0.0.1 | www.durov.ru |
| 127.0.0.1 | vk.me |
Save and you're done. The child returns to the bosom of school. You saved the child!
Note: To edit hosts you will need administrator rights. Before changing a file, it is recommended that you make a backup copy of it so that you can use it if you no longer need the lock.
Blocking on the router
Blocking Vkontakte on a router (Wi-Fi access point) is also quite simple, but has a significant advantage over blocking at the hosts file level. The fact is that a blocked computer will not stop VKontakte, because you can safely surf the site via a smartphone or tablet. But blocking at the router level will leave all devices accessing the Internet through this router without Contact. So what are we waiting for?
Take the manual for your router and find the following information: address, login and password. The address should be something like this: 192.168.0.1 or 192.168.1.1. You need to type it in the browser and enter your username and password. You will be taken to the administrative settings of your access point. If a specialist set up your router for you, you should call him and ask for the data. Without them, nothing will be possible.
In the administrative interface, you need to find the block by domain name. For example, in popular D-Link routers, to do this, you need to go to “Advanced Settings”, then find the Filtering tab and check the “Domain blocking” item. Next, you need to check “Allow everything except these domains” and below retype all the addresses that are listed in this article (see above in the text). After this, you need to click “Apply” and remember to reboot. Ready.
In other routers, the names in the menu may vary, but the meaning is the same: look for advanced settings, look for filtering or blocking, and indicate all domains related to VKontakte.
Blocking in Google Chrome and Firefox
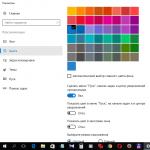
If everything described above is difficult for you, you can use a ready-made extension for the Google Chrome (or Mozilla Firefox) browser. Go to the app store and enter “Site block” in the search bar. You will be offered a wide range of extensions that allow you to block arbitrary sites and protect settings with a password. Of course, the store is just called a store, but extensions from it can be downloaded completely free of charge. Choose what you like best.
Unfortunately, although this method is the easiest (everything is done in 2-3 mouse clicks), it is also the most unreliable. Probably, in some cases it can help reduce the time spent on VKontakte, but it will not stop a serious VKontakte addict.
Set up white lists and block VK
Having blocked VKontakte and won your first small victory, do not rush to rejoice. The child will immediately begin to look for workarounds and very quickly learn about the so-called anonymizers. The principle of their operation is very simple: you blocked VKontakte by domain name. The child can no longer connect directly to specified addresses. But he can connect to an anonymizer that you have not blocked, and the anonymizer, on its own behalf, will forward the request to Vkontakte. And that's it, the blocking doesn't work. Moreover, anonymizers are often created by attackers in order to intercept the login and password for VKontakte, and then send spam or even viruses on behalf of the “victim.” And the problem is that you won’t be able to block all anonymizers, because: firstly, there are hundreds of thousands of them, and secondly, ten new ones appear in place of one blocked one. What to do?
What needs to be blocked:
As you can see, there will be quite a lot of blocking required. There are thousands of VPN services, and the number of web proxies is in the tens of thousands. Get tired of blocking. And this is where whitelists come to the rescue.
It is white lists that bring real horror to VKontakte people. What it is? Roughly speaking, you ban all sites and allow only those that the child needs for his studies: Wikipedia, school website, electronic libraries, etc. You can compile this list yourself - the child will come and explain what exactly he needed for his studies, and you will add these sites to the list of allowed sites (after checking). Or you can use ready-made lists. For example, they are built into some firewalls, antiviruses, some providers offer a filtering service using ready-made white lists, etc. Choose the most convenient option for yourself and act!
Finally, the funniest way to prevent someone from logging into VK.
How to block a page for anyone on VKontakte
From the article you will learn about what constitutes authorization of online service applications on social networks. In contact with, where the settings page for your applications is located and why you need to look there.
Registration and authorization via VKontakte
You've probably already come across social media buttons in authorization forms for online services. This is what it looks like on the Yandex website:
Yandex authorization form with social network buttonsIf you click the “VKontakte” icon, we will be asked to log in to the social network (if you are not logged in yet) and give access to the Yandex.Passport application:
Please note that in this case the application will receive access to general information your account, and at any time, even when you are offline. By clicking the " Allow", Yandex will request confirmation of registration of the new user, and in the future you will be able to log in through your VKotakte account. To do this, you need to enable authorization in the Yandex.Passport settings on the “ tab Social profiles»:
But this doesn't always happen. Some online service applications request access not only to general information, but also to other data And functions, up to the ability to publish, edit and delete posts on your wall. There will be no confirmations or settings, but problems are possible.
Access control for VKontakte online service applications
Fortunately, all these “connections” can be controlled in the VKontakte settings. Below I will provide step-by-step instructions on how to do this.
Application access control in the new VKontakte interface
Step 1: Go to My Settings page
 Go to the “My Settings” page from the VKontakte menu
 Step 2: Go to Application Settings page
On the page that opens, in the right column, click the link “ Application Settings».
 Going to the “Application Settings” page from the “My Settings” page on VKontakte
 Step 3: Uninstall the app
On the page that opens you will see a list of connected sites and applications. If you wish, you can click the " gears» in the application line and view its settings and access rights. It is noteworthy that not all applications have settings, and the access rights granted to the application cannot be changed. So if you are not happy with something, click the icon with “ cross" in the application line or link " Delete…» in the application settings window.

Application access control in the old VKontakte interface
Step 2: Go to your apps settings page
Click the link " Applications"—the VKontakte application catalog will open. Go to the " My applications"- by default you will see the message: “You have not connected any applications yet” - this is normal. Click the link " Settings"and here is a page with a list of those applications to which we gave access to the account:
Step 3: Set up and remove the application
In fact, by clicking the link “ Tune» in the application line, you will not be able to configure anything, but only see what data you have given it access to. If you are not satisfied with something, click the link “ Put away"and remove everything unnecessary.
Video: How to deny access to the VKontakte application?
| at 8:00 | Edit message | 7 comments |
You need to block Vkontakte because staying on this site, at best, will become a pointless waste of life for your child, and at worst, it will lead to serious mental problems and delayed intellectual development. The problem is that being on VKontakte does not imply any mental activity. The work on this site itself is structured in such a way as not to force the visitor to think: just post photos, click on the “Like” button and write short comments like “cool photo.”
How to block VKontakte on your home computer
To block VKontakte, you must have administrator rights. Click the “Start” button and at the very bottom, where it says “Search programs and files,” write the following command:
notepad c:\windows\system32\drivers\etc\hosts
A notepad will open into which you need to copy the following lines:
127.0.0.1 vk.com 127.0.0.1 www.vk.com 127.0.0.1 vkontakte.ru 127.0.0.1 www.vkontakte.ru
As a result, you should get the following:
Close Notepad and answer “Yes” when prompted to save the file.
Please note that the child will be able to do the same steps, exclude these lines from the hosts file and unblock Vkontakte. To prevent this, create a limited account for Windows and set a password for your administrator account.
How to block VKontakte on your phone and tablet
There are two ways to block VKontakte on your phone or tablet:
- obtain administrator rights on the device and add VKontakte to the list of blocked sites;
- block access on the router.
Both methods have advantages and disadvantages. The first one is more reliable, but obtaining administrator rights on a mobile device is not the easiest task. Blocking using the second method is carried out in a few mouse clicks, but it will not always work, but only when accessing the Internet via Wi-Fi.
Let's consider the second method. First, you will need to find out the IP address of the Wi-Fi point, username and password. If you configured the access point yourself, then this data should be known to you. In other cases, you should call the technician who performed the setup and request this data.
After you find out the IP, you should enter it in the address bar of your browser. You will be asked for a username and password. After that you will be taken to the settings section. We will consider blocking VKontakte for a D-Link router, since the products of this particular company are most widespread in Russia.
- Find the word “Advanced” at the top of the screen and click on it with your mouse.
- On the left, find the words “Filter” and click again.
- Check the “Domain Blocking” box.
- Just below, check the box “Allow users to access all domains except “Blocked Domains”.
- Enter the vk.com address in the box below.
- Click the “Apply” button below.
After completing this procedure, the router will block attempts to access vk.com from any devices connected through this access point. In a similar way, you can prohibit other social networks, for example, Odnoklassniki or Twitter.
What to do if a child has learned to bypass the ban on VKontakte using anonymizers and proxies
The way the Internet works is that any blocking of an arbitrary site can be bypassed by accessing it through an intermediary site. For example, you blocked site A. There is always the opportunity to go to site B, which will work on your behalf with the prohibited site A. If you block site B, then there will be a similar site C. Considering that there are many sites on the Internet, to put it mildly, the opportunity You will always get to a prohibited site. What to do?
For severe cases, when the child is already mentally dependent - does not understand either the verbal ban on VKontakte or the blocking using technical means - an invention such as whitelists. The point is this: You sit down with your child and make a list of those sites that are necessary for study. Everything else that is not included in the white list will be prohibited. It will be almost impossible to circumvent the prohibitions using tricks.
To enable the white list, we will need to perform the algorithm described above (see “How to block VKontakte on your phone and tablet”). However, the algorithm will need to change points 4 and 5:
- instead of the item “Allow users to access all domains except Blocked Domains”, select “Deny users to access all domains except Permitted Domains”;
- and then sequentially add sites from a pre-compiled white list.
At the end, don’t forget to click “Apply” and wait for the router to reboot. Now only study sites will be accessible via Wi-Fi. The question arises: what to do if the rest of the family needs to use the Internet? Whitelists will also apply to them. There are two solutions here:
- firstly, you can enable filtering not for all, but only for some so-called MAC addresses. Usually these addresses are indicated under the cover of the mobile phone and on the side of the tablet;
- secondly, some routers support the creation of several (up to 4) wireless networks. One can work exclusively on a white list, while the other will skip all sites.
How to block VKontakte using programs
In the near future, technical specialists on our website will prepare for you a review of programs that can be used to block access to Vkontakte. The advantages of this method are obvious:
- simplicity - no need to bother editing files and setting up the router;
- relatively high reliability - lists of anonymizers and proxies are constantly updated by the manufacturer, so it will be much more difficult to circumvent the ban;
- many good programs are distributed for a fee;
- The programs do not apply to mobile phones and tablets;
- By downloading a program from unverified sources, there is a risk of getting a virus.
Secrets of VKontakte